Triumph TR7 Rover V8 engine conversion
|
This is the next car on our V8 conversion list. Since the original four cylinder engine is already gone it made sense to tackle this one next.
This car will be a little more tricky since we do not have any more original TR8 power steering racks. Thus, we shall implement our alternative power steering setup which has already undergone some preliminary development.
For more details see: TR7 V8 Conversion Page |
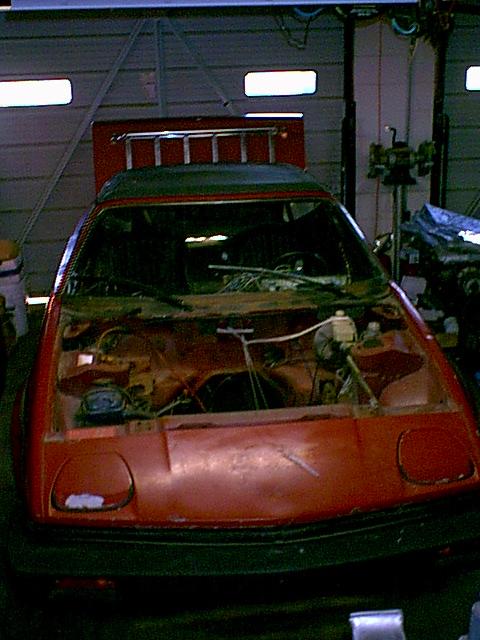  |
This is how we received the car. The original piece of junk four cylinder engine is already gone so that saves us a trip to the scrap metal yard. Since this is a late 1979 car it would have been carburetted. The only exception to our "junk the four banger policy" is if it had been one of the relatively rare models with Bosch fuel injection - they are worth keeping original as long as one is not seeking performance.
Most of the remaining items in the engine bay need to go with the exception of the brake master cylinder (it looks quite new) and the coolant header tank (what's with the blue paint on it?). We shall likely retain the carbon cannister setup and move them back & higher since TR8 ones are scarce. The EFI engine that we will be installing makes much less use of such plumbing, but one at least needs to keep them to absorb fuel tank vapours. It is a coin toss as to whether the battery trays remains - it is rather rusty and tends to act as a shield for the muck that accumulates in the seam between the inner wheel arch and bulkhead which is a notorious rust trap. |
  |
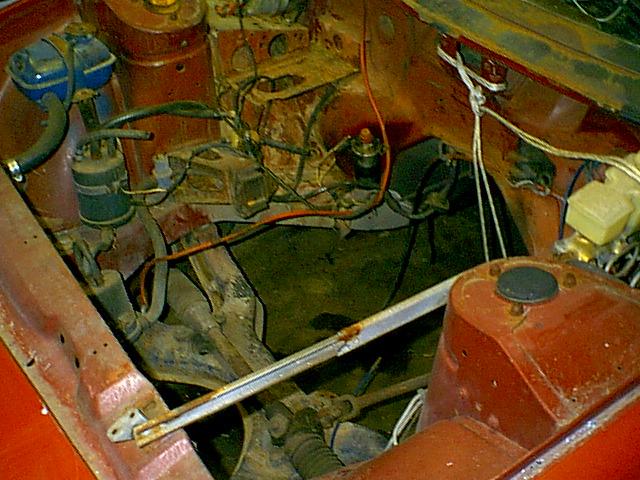
The four cylinder subframe and RH engine mounting bracket have been removed. We are going to use a reconditioned genuine TR8 subframe for this project, but decided to send it out for power coating to protect the bare welds that resulted from the fabrication shop having to cut the towers off the damaged TR8 subframe and attach them to an undamaged TR7 subframe. Sharp eyed viewers will notice that there is something amiss with the upper strut mount on the right hand side of the car - we shall investigate and report back. |
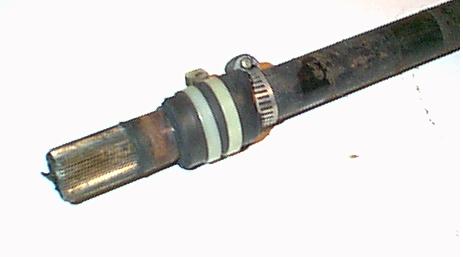 |
This example of 'redneck repair' is actually from the silver car, but we decided to feature it here since this car is also in need of a new steering column bushing where the column passes through the bulkhead (firewall). This is exactly the kind of botched repair that we despise. As long as people are doing this kind of thing these cars will never appreciate in value to the levels they should be at. |
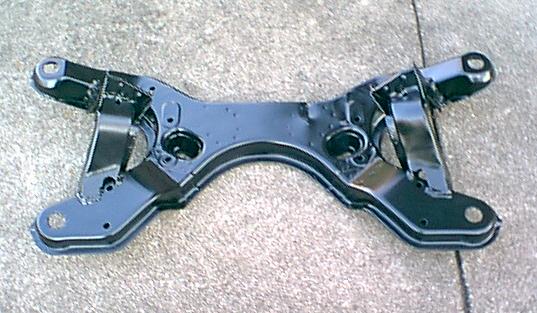 |
However, there nothing redneck whatsoever about the superb job that the local powder coating firm did with the subframe. If you're in the Clarksville, TN area and need powder coating work done then we highly recommend giving Hard Shell Powder Coating a call at (931) 542-9953 |
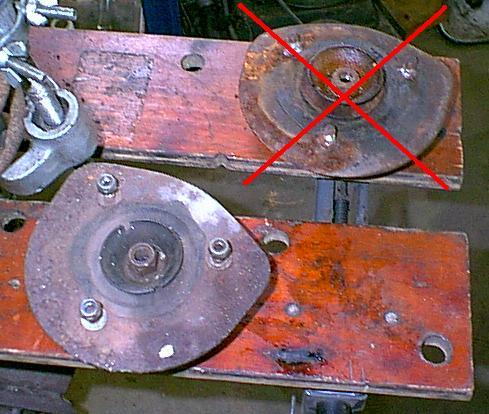  |
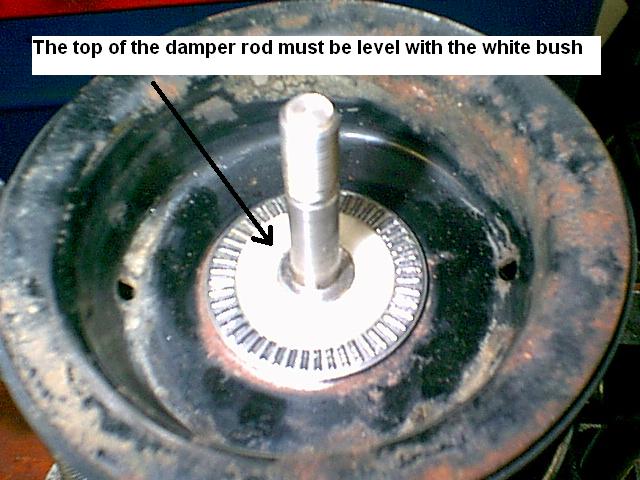
The redneck repair for this week is shown in the left photo. Disassembly of the strut revealed that someone had put the large flat washer on top of the upper mount and it it appears that the upper mount is a similar one they have substituted from another make of car! The large flat washer is one of the three parts that are discarded when fitting the upgraded needle bearing kit.
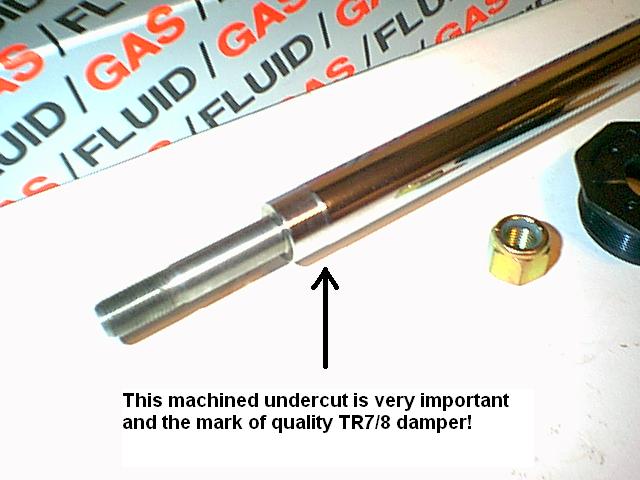
The right photo shows a very important to feature to look for when buying dampers (shock absorbers). Quality parts such as those from KYB and Spax will have this feature. Beware of cheaper 'white box' product that is currently on the market! |
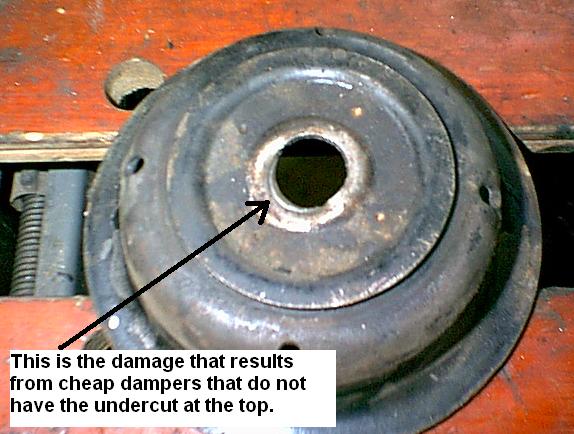  |
The left photo illustrates what happens when using cheap noname dampers (shocks) as described above. This is caused by the upper spring plate not seating properly. Improper seating of the top spring plate will also be indicated by the dished washer under the main nut turning in the rubber mount. When assembled properly they should turn together with the damper rod - that's what the bearing is there for! We also have reservations about the upper mounts (TKC1205) that are currently on the market. Whilst they appear to be a nicely made product, the cone profile on the underside is not quite right and the consequent improper fit also results in the dished washer turning in the rubber. |
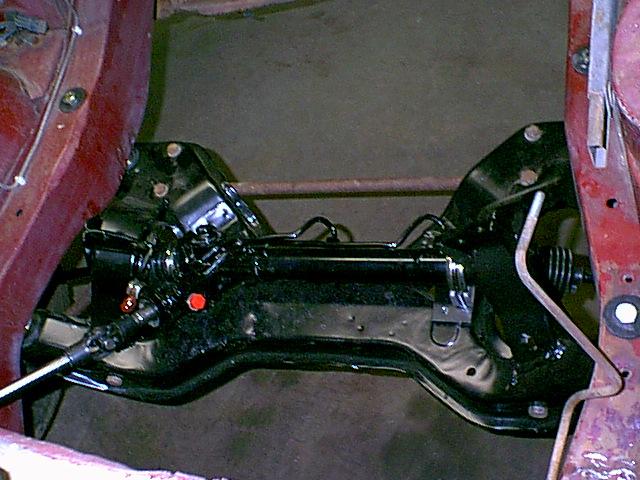 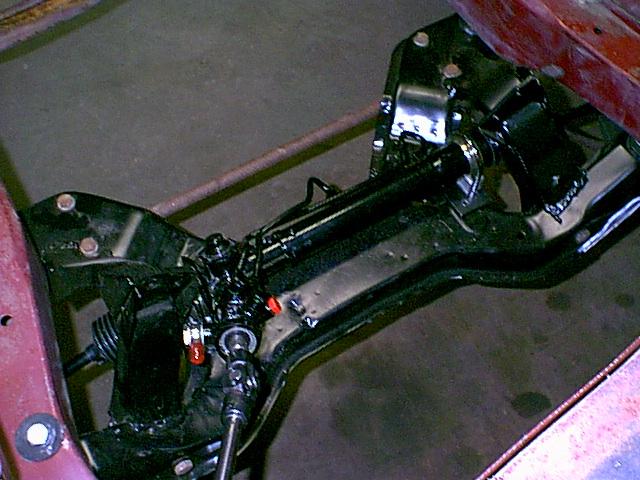 |
We now have the subframe installed in the car and Maval have supplied us with a substitute power steering rack since genuine TR8 racks are quite hard to come by.
The lower steering shaft is a hybrid of the TR7 shaft and a Sweet Manufacturing racing u-joint. Our fabricators will have to pin and weld the two pieces together. |
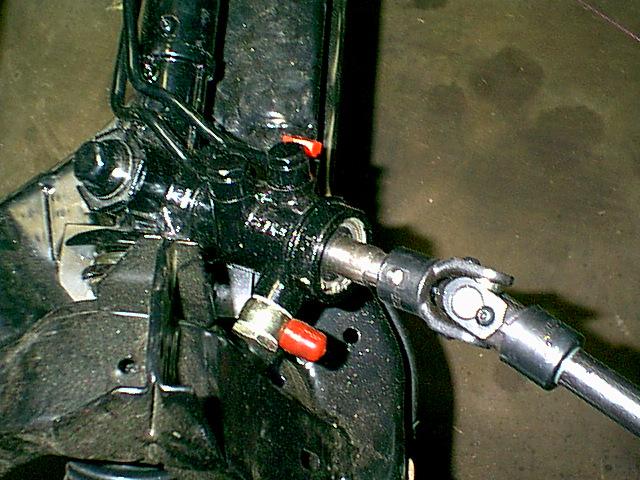 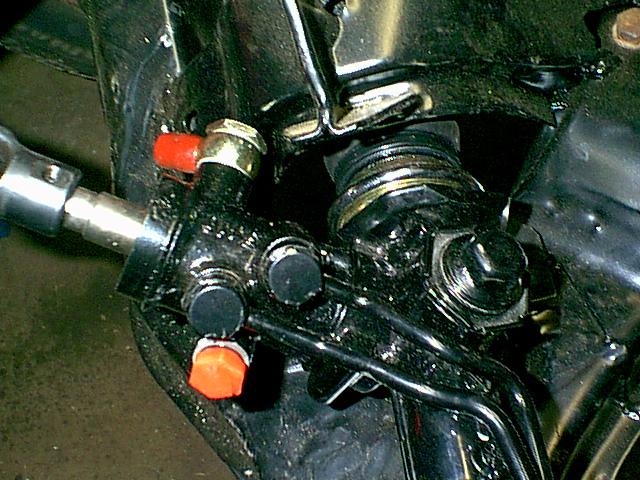 |
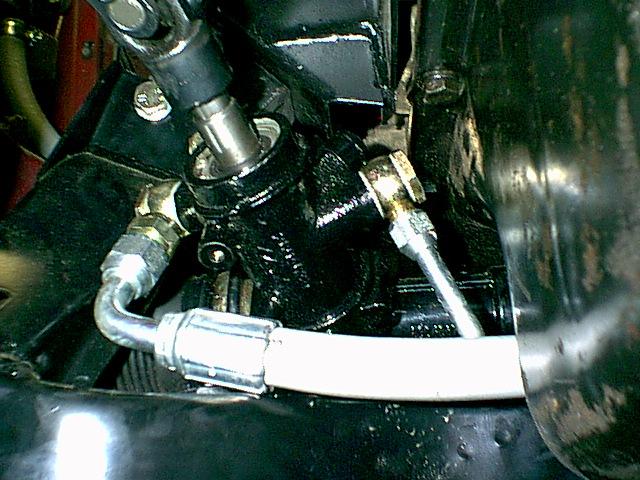
The replacement rack supplied by Maval appears to be a good, albeit somewhat tight fit. We had to employ banjo fittings for the pressure and return hose connections because of their proximity to the subframe towers. Unfortunately, there was not enough clearance with the modified TR7 subframe so we have asked the vendor to address this on their next production run. |
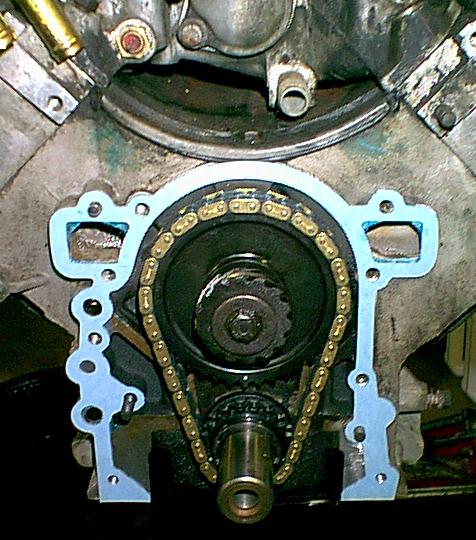 |
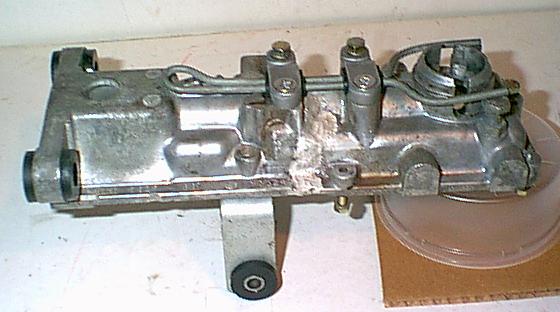
With the engine out of the car and on the stand, now is the time to replace the timing chain since the stock chain will undoubtably be slack on a typical secondhand engine. It is much easier to do this job at this stage because once the engine is in the car it is far more difficult. If one is faced with having to do a timing chain on a TR8 with the engine in situ, then one might as well go ahead and remove the radiator & fans since that will be almost essential to give any kind of decent access. The chain in this engine had about an inch of slack so we replaced it with a good quality aftermarket chain & gear set featuring steel gears as opposed to the stock nylon toothed cam gear which is largely the cause of the slackness problem. |
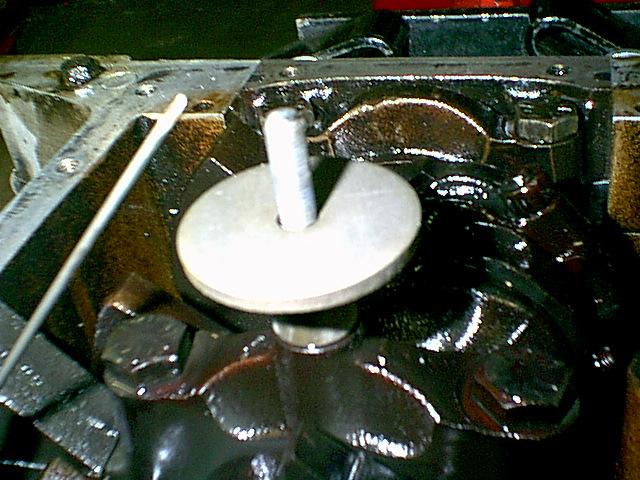  |
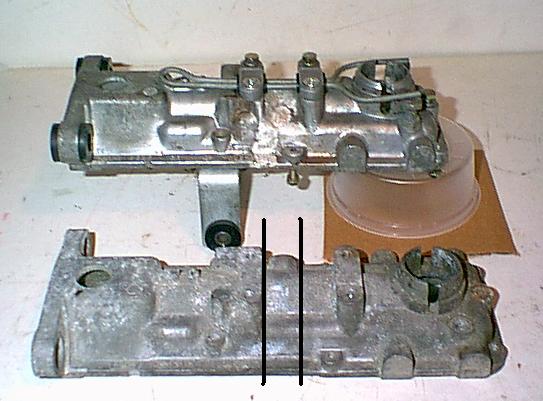
Since the engine we are using is from a Range Rover it is necessary to replace the oil pickup and windage tray along with the oil sump (pan). The left photo shows what needs to go on before the windage tray. An additional flat washer is required between the pickup and tray (not shown). |
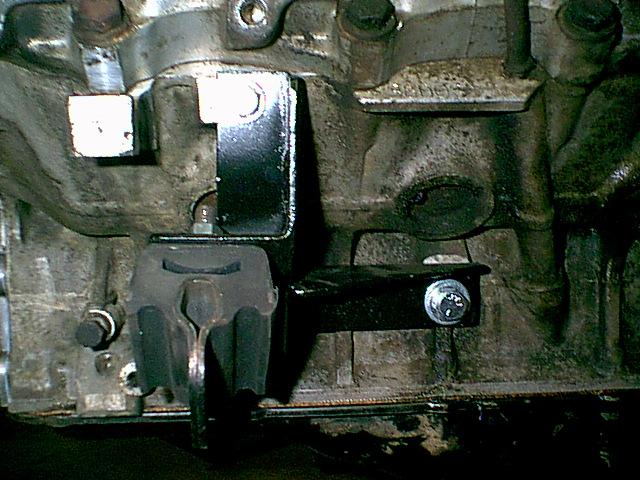 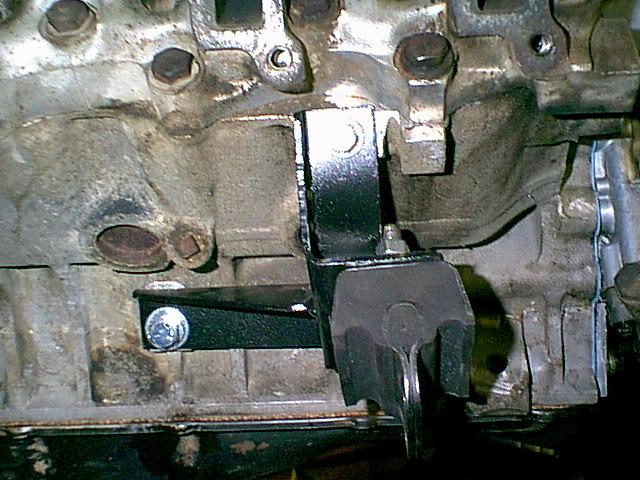 |
The quality of the engine mounting brackets for TR7 V8 conversions that are currently on the market leaves a great deal to be desired. The set you see here is actually one of the better ones we have come across, requiring only minor elongation of two of the mounting holes in order to fit! Most are hopelessly far off and we have sent some back to England. If anyone knows who makes these things we would like to know, so that we may suggest to them that their welders not spend two or three hours in the pub at lunchtime!. |
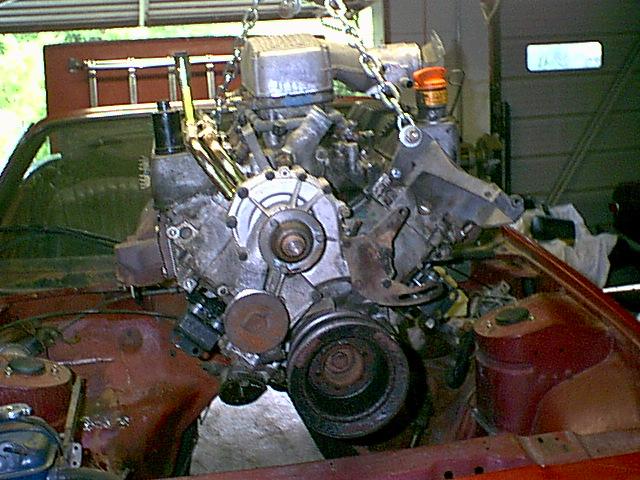  |
The engine is about to be lowered into the car - we were hoping it would go in with the crank pulley attached but it quickly became obvious that it would have to be removed. |
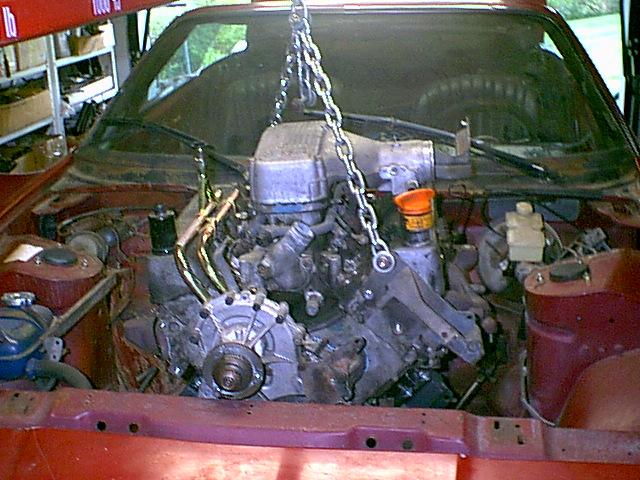 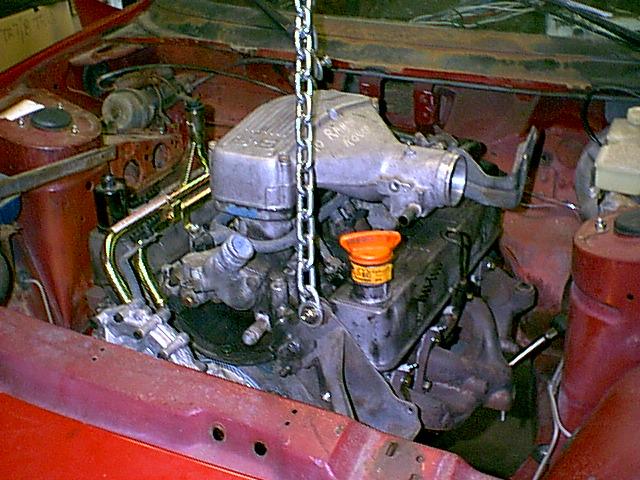 |
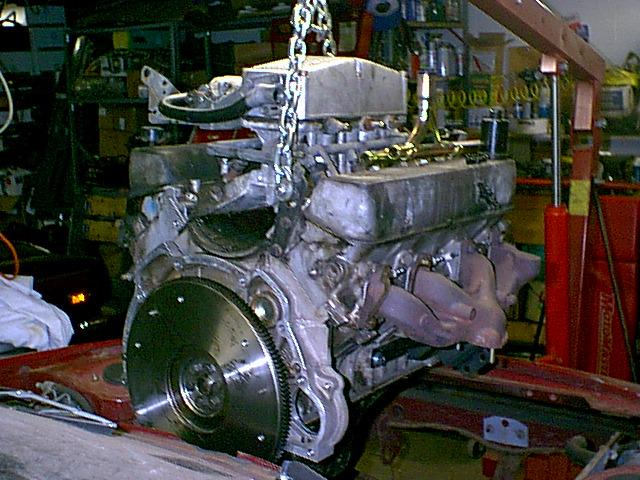
It looked like the water pump might have to come off too, but it just clears. |
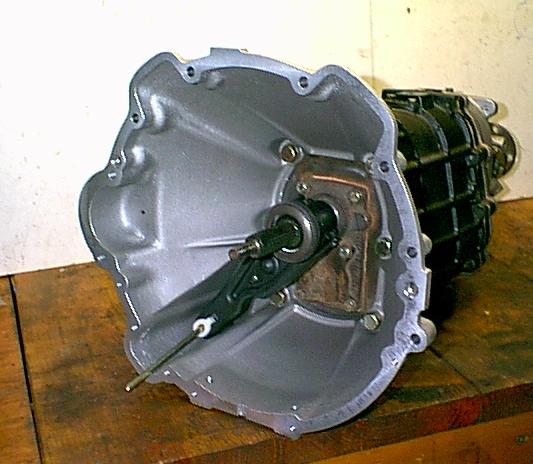 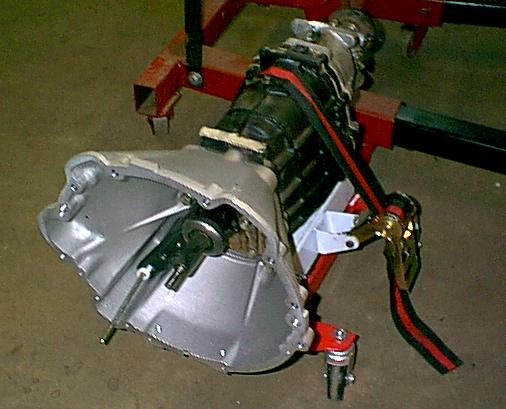 |
Installing the gearbox is made much easier with a proper transmission jack. The existing TR7 gearbox can be reused, but the bell housing, clutch fork pivot and release bearing carrier are different. |
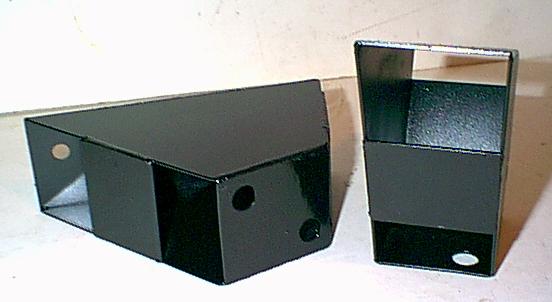  |
Lower radiator mounts for a/c equipped cars are not currently available and the ones offered for non a/c cars are poor quality because the rubber bushes do not seat properly. The solution is to manufacture adaptor brackets as shown in the left photo which allows the TR7 lower radiator support to be reused.
The banjo fittings supplied with the steering rack allowed the hoses to be connected despite the tight space available. |
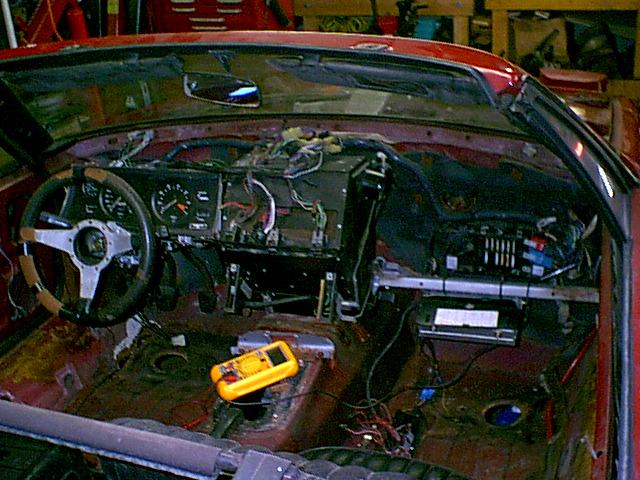  |
We decided to rewire the car with an alternative main harness salvaged from a junk yard because the original harness was in disarray as a result of someone removing the wrapping tape. The replacement is from a 1980 model car. The main difference involves the connections to the engine bay harness since the coil on the later models is in the region of the brake booster.
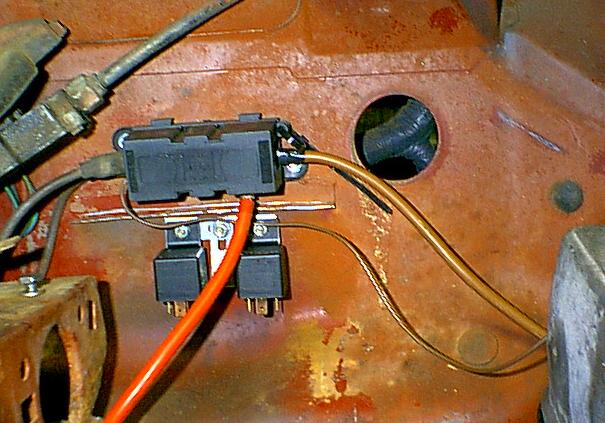
The right photo shows the main power distribution block and EFI system relays. The two relays control the fuel pump and switched ignition supply. The large hole will be used for the fuel injection system harness. |
  |
The V8 engine and gearbox combination causes the gear lever to be too far back as compared with the four cylinder car. To solve this we had our tool & die firm remove approx 20mm from the gear lever extension housing & selector shaft. There is only one location on the extension where material can be removed without impacting the functionality of the unit. |
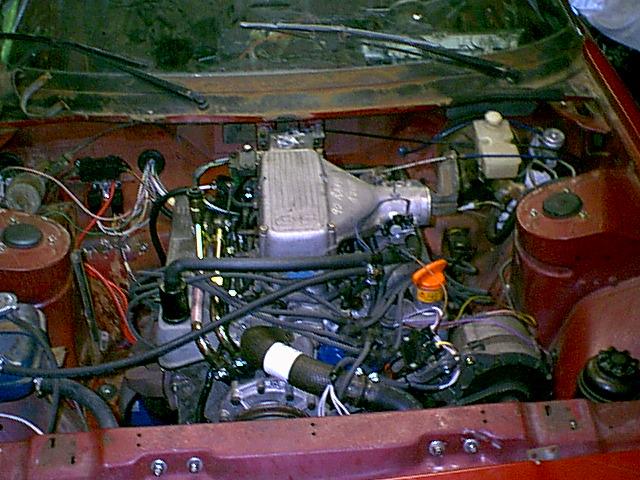 |
The engine runs! |
|
|